In his email, he expressed an interest to collaborate with me in doing nocturnes 360 panorama. I was intrigued at his idea and thought I should give it a try...
_
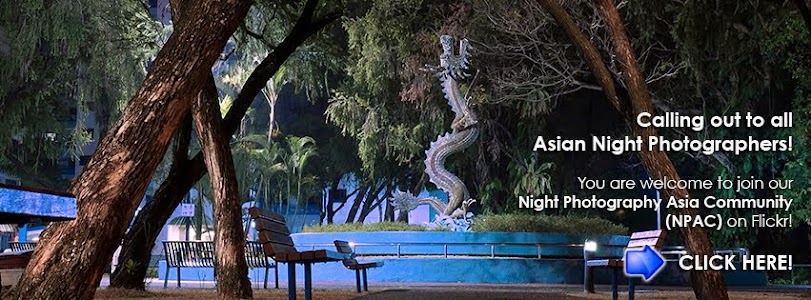
JOIN US NOW!
Sunday, December 27, 2009
Fort Gate Nocturne in 360 panorama
On 22 November 2009, I received an email from a fellow photographer, who is best known for his 360 panorama photography work. He is known as Wee aka etegration. A cheerful and chatty young guy who's passionate about what he does best. His reputation in making 360 panorama images has preceded him in my case, in the last 2 years.
Monday, June 15, 2009
Laser Pointer, a Light-painting Tool
 |
| My laser pointer. © 2009 Martin Liew Photography. |
I want to talk about one of the tools used in my nocturne photography i.e. laser pointer. It's a small lighting gadget and yet so useful. I came to discover its usage a few years back when I was doing nocturnes at a local botanic garden, in which they have a small park named Evolution Park. It's a man-made garden in the age of Jurassic with some man-made "dinosaurs" foot prints. As it's not as gigantic as the real monster size, I was thinking hard on how to bring out the shape of the foot-prints in color. That was when the laser pointer idea came to mind. I know it's not something new especially in light-painting and night photography, but it certainly helps me in my creative work which I'll show you shortly.
Laser pointers are battery-powered laser diode and are often used in educational and business presentations where pointing out details by hand is inconvenient. It comes in varies colors - red/red-orange, blue, green, yellow, violet.
As far as I know, we only can get red/red-orange and green colored ones in the local retail stores. Nonetheless, we can still order on the internet, but the prices are steep based on the power level, measured in milliwatts, mW. The power output can be as low as 1 mW and as high as a 125 mW. It would be a thrill to own a set of varied colored laser pointers. It serves like a small paint brush to do light-painting on more precise and specific area. Take one good example from the photograph I made, shown below.
 |
| Waiting Chair © 2009 Martin Liew Photography |
In this nocturne photograph, I applied the usual simple light-painting techniques. The room interior on the right side was lit up by a flashlight with a yellow colored cellophane paper. Next I used my LED torch light to light-paint the wall. As I set my digital camera White Balance to Tungsten, LED light induces a blue color cast which is not as vibrant as a true blue colored gel. Yes LED torch light is also another useful light-painting tool.
Lastly I used my laser pointer for the window panel. The great difficulty of using a laser pointer is the tremendously flicking shaking light due to our own natural hand shake, not to mention controling of the light beam direction. Not even people with steady hand power are able to hold still or light-paint in straight line. The greater the subject distance, the more difficult to light-paint as the area is getting smaller. Well, in this case the window panel is in straight symetrical lines, vertically and horizontally. The surface area is slim and narrower which poses great challenge. I did practice a few rounds before I press the shutter release. It takes practice to do a proper light-painting job using this small tool.
Here's another nocturne example I made using my laser pointer on the leaning door.
 |
| Red Leaning Door © 2009 Martin Liew Photography. |
I opened up the diopter on my laser pointer to have a wider light beam in rectangular shape, so I can light-paint on such bigger objects with large surface area. The subject distance is closer and controlling is a lot easier. But still, the light spilled and touched onto the wall.
So if you do many light-paintings, you can consider using a laser pointer for additional effects. I do find it very useful and certainly helps me in my creative process of nocturne photography. Thought you might be interested to know and try them out yourself.
Saturday, June 13, 2009
NOCTURNES: The Art of Surrealistic Landscape Part 3
 |
| Excavator © 2009 Martin Liew Photography |
In my last weekend night photography outing, a new friend joined us for the first time in making some interesting night pictures. I took them back to the same old location I did for the past few weekends.
A minor and yet interesting incident happened. We were greeted by some young night dwellers who claimed they are also doing night photography in the same premises we were at. We found out later through a conversation with one of them that they came in 3 separate groups, going different directions in that location area. We saw many flashlight pops. Some of them do not look like photography hobbyists nor enthusiasts. We didn't talk much either but just to make known of our own presence.
Anyway it was yet another fruitful night outing with new nocturne pictures made and to share. I didn't make many pictures that night but able to get 3 pictures that I like very much. Excavator is one of them. It was made towards the dawn hour and we were trying to make different angle shots before day breaks.
I've noticed there are some restoration and construction progress in that location area, as the abandoned buildings are converted into offices. So the work has speed up a little. I feel like going back on the next full moon night but not sure what will happened then. Just gotta do it.
Saturday, May 30, 2009
NOCTURNES : The Art of Surrealistic Landscape Part 2
 |
| Quiet Corridor © 2009 Martin Liew Photography |
Quiet Corridor is one of the new set of nocturnes I made last week. On my previous night trips, I have covered 2 abandoned buildings in one of the areas and as the daylight started to break, I wasn't able to make any more photographs in this other abandoned building, just right opposite. I was so sure that there are many good opportunities for good nocturnes to be made.
I was right. And with the help of my friend who tagged along with me on that night, we discussed about the mixture of colored gels and which lighting method to use. For this nocturne photograph, both lighting techniques are applied. Let me explain how this photograph was made.
The first light-painting with a 1-million candle light power searchlight, covered with a lavender colored gel, was applied on each pillar on the right side, which also spill some light over onto the left-side wall. This helps to eliminate the dark shadow area, revealing more details and textures.
Next, I walked over to the left side of the staircase and using a green colored gel on my flashlight, I popped twice onto the stairs. Thereafter, I walked all the way to the end of the corridor and keep myself out of sight from the camera. With my searchlight, I switched it on and shone yellow light onto the ceiliing for about 10 seconds. That's it! Total exposure timing is 172seconds.
I really love these 3 colors as they match so well together. Basic color matches play an important part in nocturne photography and just like art paintings, it's the photographer who (as the painter) decides what color to match and to use colors to convey emotional message or express certain feeling, in their work.
To view more of my nocturnes, a new set of nocturne photographs are uploaded in my website.
Sunday, May 24, 2009
The Beauty of Night Sounds
Last night (23 May 2009), I stayed up for the whole night doing some really good nocturne photography in the north area, with a friend of mine. Not only was I making light-painting photographs, I was making some good black & white night photographs with my TLR camera as well.
As I have always love the night atmosphere with its tranquility, I too experienced the most beautiful sound of the night i.e. the cricket sound. The sound really adds up to the atmospheric mood in the quiet night especially when you are alone. There's this sense of peace, though I'm busy in the process of seeing, composing, thinking, planning for the light-painting. It's just so fabulous and mesmerizing, at least to me.
I got myself a digital voice recorder 3 months ago and have used it for recording seminar talks and to record essential detailed data information during all my night photography outings. Data information that includes location, camera settings, techniques I used, etc. So at that moment it occurred to me that I can use it to record the night sounds and the idea of putting up the recorded sounds in my night blog site just popped out. The sound would make my blog site more interesting and alive. Hopefully readers who visit my night blog site will be able to feel more present as they read and see my night photographs.
So here it is. I embedded one of the sounds I recorded on my blog site. If it distracts you, you can turn the player off which is located right at the bottom right section of my blog site.
Tuesday, May 19, 2009
NOCTURNES : The Art of Surrealistic Landscape
 |
| Abandoned House © 2009 Martin Liew Photography |
Finally, I've come up with the right title for my nocturne photography work, NOCTURNES: The Art of Surrealistic Landscape.
The photograph above was made on 9 May, Saturday night with a couple of friends. Each of us took a different vantage point and I did all the light paintings. Pity we couldn't stay longer, so I decided to go back on my own on the following Tuesday, 12 May right after work.
I found myself getting gutsier and bolder than ever, traveling all the way up to the north area after work to make some good nocturne photographs, all alone in this dark quiet place. I really had a good time exploring the location and certainly enjoyed the quiet night atmosphere. Well, I didn't stay long, say for about one and a half hours.
I made a point and effort to go back on the following Saturday and stayed there until dawn. It was fabulous doing nocturnes in that place. You can view more nocturne images directly at my website here.
Stay tuned for more night and nocturnes photographs here at my blog site, OR you can subscribe to my blog via email or RSS, by selecting yr choice in the column, First Time Here?.
Thank you for reading.
Saturday, May 16, 2009
Frank Relle Nightscapes Photography
Recently I came across this night photographer's work on COLOR, a magazine on collection of fine photography. His name is Frank Relle.
Frank Relle (b. 1976) is a photographer born and based in New Orleans, Louisiana. He is the recipient of numerous awards including a 2007 International Photography Award and the Photo Lucida Critical Mass top 50 photographers.His work is represented in major public and private collections, including the Smithsonian Museum of American History, the New Orleans Museum of Art and the Museum of Fine Arts Houston. His photographs have been printed in the New Yorker, the Southern Review and the Oxford American magazines.
Relle continues to document the changing architecture of New Orleans and is working to share his images with an international audience hoping to inspire people around the world to help rebuild the city of New Orleans with the integrity she deserves.
Sunday, April 19, 2009
My Nocturnes Again
Well, here I am again. Back on to my night photography blog after a year of absence. I'm back again this time for another series of my nocturnes. Here are the 4 nocturnes I did on 2 separate nights. The first 3 shots were made last October and the last shot was made last night, all at the same location.


It was thrilling and full of excitement as I once again did it for this shot. And I thought to myself that I should go back and make some more nocturnes photographs. Well, I do have another location in mind that I want to explore, but based on my outing experience last night, my 2 camera batteries power just not enough to carry on making pictures for as long as 3 to 4 hours. I need to get 5 more spare batteries.
So if you have and want to sell off yr camera batteries, please do let me know. I'm using a Nikon D70s so it's the Li-on battery pack, EN-EL3a.
Some information on the photograph made:
This light-painting photograph was made with my Nikon D70s on Tamron 17-35mm f/2.8 lens, set at the smallest aperture @ f/22 on 'B' mode, for long exposure timing of about 3mins 30secs. Five colored filter gels are used - Blue, Yellow, Green, Lavender and Violet. WB is set to Incandescent (or Tungsten). Photograph is recorded on digital RAW.
The star burst effect on the extreme right frame is caused by the road side lamp, with which closing down to the smallest aperture will have this result. The 2 stripes of light trails are caused by the MRT trains coming and going from the MRT station nearby, on the top and passing by vehicles, on the bottom.
© 2009 Martin Liew Photography.
All nocturne photographs are solely under copyrights of Martin Liew.
Subscribe to:
Posts (Atom)